Drywall is among the most inexpensive and prevalent building materials used in the construction industry. It is cost-efficient, fire-resistant, and has insulation and sound-absorbing properties. Drywall sheets come in various styles and designs and are also highly versatile, making them ideal for other applications other than creating walls and ceilings.
Although drywall hanging pattern does not need much expertise, they can quickly become a complicated process. Due to poor drywall installation procedures, even an experienced professional will struggle to create a flat, undamaged surface and prepare for paint.
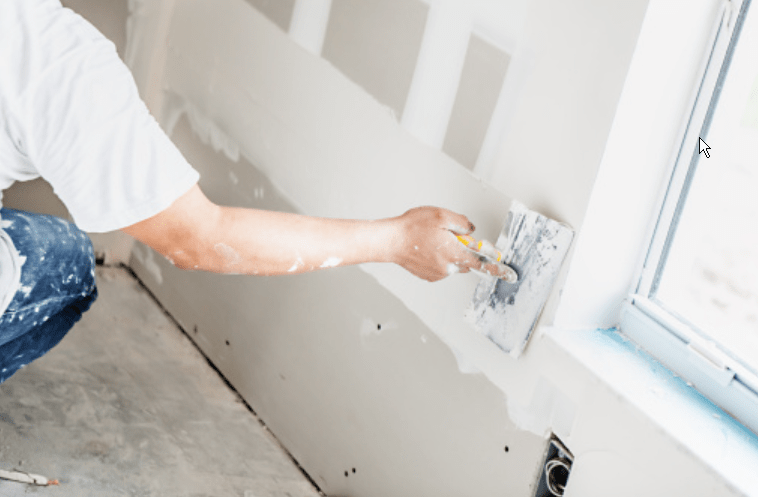
Here are some of the strategies and tools that professionals use to complete drywall jobs quickly and as smoothly as possible.
Setting Up a Drywall
Step 1: Within 4 inches of drywall edges with no reinforcement, fasten the wood backing. Ensure that all corners and ceiling/wall joints are in good working order.
Step 2: Trim the sheet to length. Measure from the ends of the ceiling up until the midpoint of a joist. You should split the framing components at the end cuts. Edges and splices should have intervals of less than 1/4 inch. A drywall square indicates attaching instructions every 16 inches from the sheet’s border. To make fitting easier, trim overall lengths 1/4 inch shorter.
Step 3: Using a drywall square as a straightedge, determine the required length and score the material surface with a utility knife.
Step 4: Split the paper open, fold it in half, then cut through the back of the sheet.
Step 5: To achieve tight couplings, use a Surform instrument to level rough edges on the cut ends.
Step 6: To hold a substantial share of the weight, raise the ceiling sheets upward and tack them into position with a “crutch” formed of 2x2s. Nail and install the sheet on the joists, nailing it in place.
Step 7: Take measurements from a wall border to the middle of a framing member, taking note of cuts and door and window entrance distances. Avoid putting joints over the edges of doors and windows, as they may fracture.
Step 8: By slicing the sides of a single sheet with a drywall saw, you can cut the window and door notches. Although a keyhole saw is sluggish, it is a good option for long cuts.
Step 9: Using a utility knife, mark the third side of the notch.
Finish the cuts from the back by snapping the part and detaching it. Use your utility knife to draw behind the T-square while sliding it along the top for rapid rip cuts.
Step 10: Raise the top wall sheet and fasten it into position with nails, keeping it close to the ceiling. Before securing, make sure you press the sheet tightly. Breaking joints along the border of a window or door is never a good idea. These gaps will inevitably fracture, and the tape buildup will challenge casing installation. Before hoisting, remember to mark the fastener guidelines.
Step 11: You should measure the cutouts in electrical boxes from all four corners. Before cutting, double-check all plan dimensions.
Step 12: Make a mark on the drywall with your dimensions. If you miss when designing and cutting slots for electrical boxes, that big outlet hole will be a pain to replace. Repairing an opening with a bad cut or overcut is challenging, and the result will never be perfect.
Step 13: Attach the bottom sheet into position using a foot lift or a flat bar. If you need to create minor adjustments to an opening, use your utility knife to scrape the corners.
Step 14: Using a screw gun, fasten the ceiling and walls together. Every structural member should have five fasteners in each tapering border and three more equally placed per 12 inches. Screws on the extremities of sheets, when there is only 3/4 inch of wood remaining to catch screws, should be at a slight angle. If you put them near the end, the drywall base will shatter, and they won’t hold up well.
Place nails and screws slightly underneath the paper’s top, ensuring not to puncture the gypsum base. To conceal the fasteners, place them near the window and door holes so that the border will cover them. For 1/2-inch rock, utilize 1-1/4-inch screws, and for 5/8-inch rock, utilize 1-5/8-inch screws. Nail pops are more likely with lengthier screws and nails. Use as few nails as necessary and only attach the sheets until you can install the screws.
Step 15: After completing the drywall, go over every fastener with a putty knife. You might find a stray pin that you need to set if you notice a snap. If you use your hammer to fix a jutting Screwhead, the screw may break, resulting in a giant hole to patch and the possibility of a nail popping later.
When you come across a protruding Screwhead, use a screwdriver or a handheld drill to push it in. Uninstall any screws that did not make contact with the frame component. Consider any other essential elements running underneath the drywall like plumbing or wiring by installing access doors. Installing fire-rated insulated access panels with drywall flange might be an excellent idea.
Final Thoughts
DIY installations may cost you less, but they come with certain risks, except if you have adequate experience and the right tools. Working with a licensed professional is undeniably better so that you no longer have to worry about making a mistake and end up spending more than hiring a contractor. In addition, they can offer insights into other factors that you might miss and provide additional advice.
Order Now!
If you are looking for drywall accessories like an access door, you are in the right place. Here in Best Access Doors, you can choose from our vast collection of drywall access panels or speak with our product experts to know which product is the most suitable for your needs. Call us now at (800) 483-0823 to learn more about our exciting promotions!
