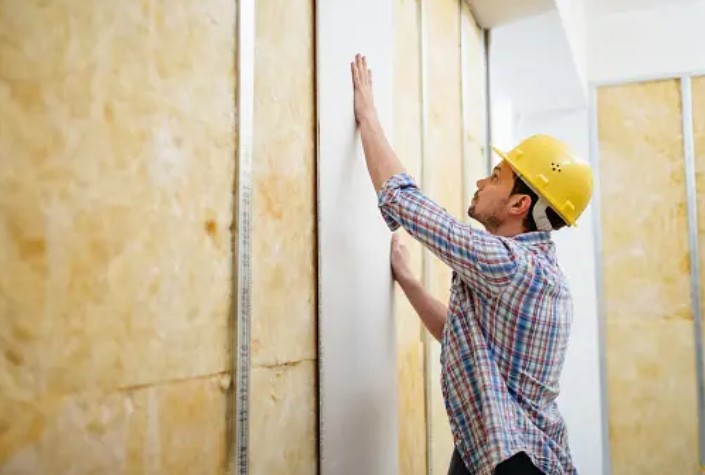
Drywall is an easy-to-use and cheap construction material that you can use in your building. It is also known as sheetrock, rock, or wallboard, and is an important part of the construction. Before the recognition of the use of drywalls, a huge amount of time to build a foundation that can hold paint or wallpaper was needed. Now, you don’t need a truckload of tools in installing drywall. All you need to do is just get yourself familiar with the fundamentals of installing drywall.
Installing drywall and even a drywall access panel doesn’t even require a lot of finesse but it can still be heavy work if you are not fit and you don’t know what to do. Fortunately, if you have a strong back and you can climb at least four steps without wheezing, then you don’t have to be afraid to tackle one or more rooms on your own.
This article will teach you the basics of installing drywall.
Start With the Right Layout
This is the first basic step in installing drywall. You have to know the sizes of the drywall. Typically, it comes in 4’x8’ sheets. Larger sheets with 4’x12’ are available but they are harder to work with and are usually used by professionals. The larger sheets also tend to break easily during transport.
Installing drywall means that you first have to take a pencil and mark on both the floor and ceiling the placement of the vertical studs. This will help you simplify the attachment of the drywall panels. Instead of following the usual professional method, you can begin in one upper corner of the room and install the panels horizontally with the top edge against the ceiling. Make sure that the end of the panel falls over the center of a stud and you may also need to score and snap the panel so it will fit.
Attach the First Panels
You can now begin attaching the panels by driving some screws or nails on the ends and down the center of the panel to hold in place against the studs. Drive the screws far enough to dimple the surface of the drywall but not hard enough to break the paper surface. If you are using ½-inch-thick drywall, you can use one and a half inch long screws and nails. For ¾-inch-thick drywall, use one and three-eight inches screws. Keeps the screws along the sides of the panel, at least a half-inch away from the edge. Put 8 to 12 inches apart spaces between the fasteners along the side edges and not more than 16 inches apart where screws attach to the studs.
Cut the Adjoining Panel
The next step is to measure the distance between the first drywall panel installed and the end of the wall. You may also need to install a full second panel for larger rooms while for smaller rooms, it is more possible that you will have to cut the adjoining panel to size. In trimming drywall panels, the easiest way is to score the face of the panel with a utility knife guided by a drywall T-square of a metal straightedge, and then snap the panel away from the scored line. Continue the installation until all the drywall panels in the top row are positioned and attached between the walls.
Make Cutouts Around Outlet and Switches
Here, you can take careful measurements to make cutouts for electrical boxes and other obstructions, and then transfer them to the drywall panels to mark cutout locations. Next is to remove the panel and use a wallboard saw or rotary drywall cutout tool to finish the cutout marks. This panel can now be positioned on the wall and then you can attach them with screws or nails.
Hang Drywall Around Windows and Door Openings
If the drywall panels fit around window and door openings, you will need the panels to be notched to fit around them. You can do this by taking measurements and marking the drywalls, then cutting along the marks with a rotary cutout tool or a manual drywall saw.
In attaching panels around windows and doors, you have to make sure to use all the required screws or nails because structural strength is also critical. Also, avoid aligning the joints between panels along the edges of windows or doors, or placing them directly above or below windows and doors.
Hang the Lower Panels
Lastly, install the bottom row of panels. You can begin installation in the opposite corner of the room to offset the vertical seams from the top row to the bottom. You may also need to use a foot-operated wallboard lift to lever the lower panels upward since they have to be snug against the top row of drywall. The preference is a ½-inch gap between the bottom of the lower drywall panel and the floor to allow room for some seasonal expansion and contraction of the drywall. This will help prevent buckling.
Once you are done, you can already ask a professional to do the finishing touches for your drywall installation.
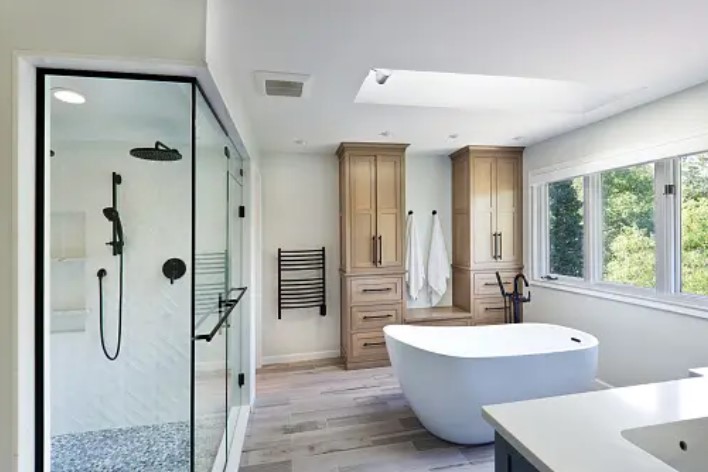
Having a bathroom that reflects your personal style while also able to provide the comfort that we need is important. However, other than having a stylistic and comfortable bathroom, it is also important that it has the right fixtures and amenities such as lighting, wiring, plumbing, and access doors that provide function and value.
Luckily, by careful planning and choosing the right design for your bathroom, you can achieve a perfect bathroom renovation. Here are some things that you must consider and mistakes that you must avoid.
What You Should and Should Not Do
Have a Plan
Planning is probably the most important and the very first thing that everyone does before starting any kind of work or project. Before you start calling a remodeling company, figure out what fixtures and finishes you are supposed to have and how much budget you will be able to disburse. Make sure that you know how much money you have to spend so you can categorize the projects that must be prioritized. For example, what are the things that must be at the top of your list when you start the renovation? When you plan for your budget, it is also important to include a little extra in case you meet some unexpected problems that might increase the cost later on. Additionally, know how long the process might take and resist changing your plans except when financial constraints take place. This kind of planning will be very helpful in making you go a long way as you move along with your project.
Leave the Complicated Tasks to Professionals
As much as it is satisfying to be able to do a good DIY project, bathroom renovations are not easy and you might end up having additional costs if you manage to botch a job. A bathroom renovation does not only mean painting and replacing tiles, but you can also run into issues in your plumbing and electrical system. For example, you need to improve the electrical capacity in your bathroom. Hire a contractor to upgrade your wiring system. New sinks and showers are needed to be installed properly to avoid mildew and other rust and rot issues and this is something that a good contractor will be able to do.
Pick a Bathroom Layout
When selecting a bathroom layout, you have to look beyond the bathroom. You must also consider the entire look of your place. What kind of layout is the best match for your interior design? Does your preferred bathroom layout blend well with the entire place?
Don’t Leave the Project Unfinished
This is important when you decide to make a bathroom renovation. Don’t ever leave any project unfinished. Remember that a bathroom is necessary for any kind of building and leaving your bathroom unfinished and out of order is most likely to stress you or the other occupants of the building.
Don’t Change Wiring and Plumbing Unless Necessary
Do you want to be able to save a good amount of money on the demolition and renovation of your bathroom? Then it is highly advisable that you keep your new bathroom’s wiring and plumbing fixtures close to the existing one. However, in case the renovator finds outdated wiring or plumbing, then it would probably be his recommendation that you remove the old wires and pipes and install new ones possibly in different locations.
Maximize Your Space
As much as possible, try to use all the space in your bathroom. If your bathroom is small, you have to think of creative ways in order to make space look larger. Pedestal sinks instead of cabinets are ideal if you occupy less space. Your cabinets and towel racks placed above the toilets are perfect if you need storage but you don’t have enough space to work with.
Think of the Future When Designing
Lastly, always think forward. It is important to ensure that your property’s value will increase over time. If you plan on selling your property in a few years, consider the best options in renovating your property in a way that its value will increase. On the other hand, if your plan is to stay in your place for a couple of years, it is important that you ensure that the design you choose is something that you really love and fit your taste.
Need more information on ways to improve your bathroom or any other construction project? Visit Best Access Doors.
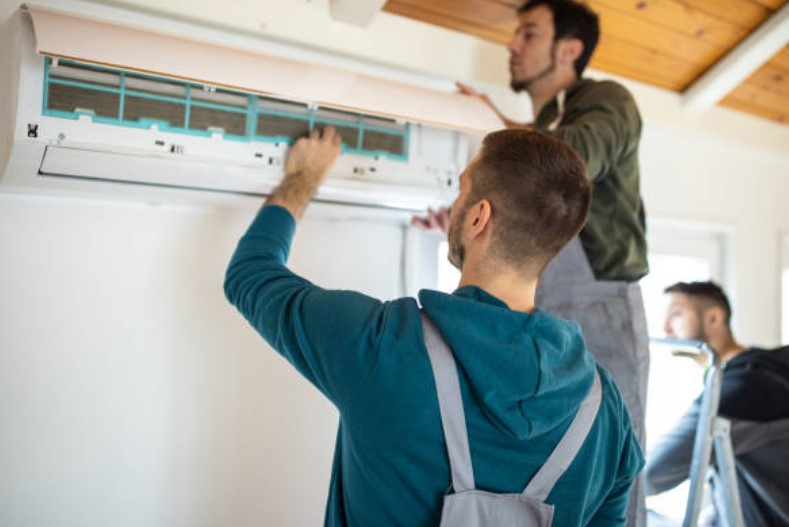
Your air conditioning system puts in long hours to keep your facility cool and pleasant. You don’t even think about it until it breaks down in the middle of summer when you need it most. AC breakdowns are inevitable, but they can be less likely if you take care of them regularly.
Regular maintenance is easier with an AC unit door. It helps technicians get to HVAC systems faster when necessary for maintenance. Here’s why.
Enhances Air Quality
It is important to note that a unit in poor condition may circulate toxins throughout your home. They could transfer viruses, bacteria, and other materials throughout the building, such as pollen, dander, dust, and allergens.
Poor air quality exposes your family to significant health hazards, including asthma, sinusitis, cough, and allergies. A well-maintained AC unit operating at maximum capacity will make your area more pleasant by managing the humidity and cooling.
Additionally, older people are more susceptible to air pollution, which could substantially impact their health. To ensure good air quality, you must ensure that the air conditioning equipment is in good condition.
Saves You Money
Maintaining your AC can save you a lot of money in the long term. Many people believe that having their air conditioning system maintained by a professional is an unnecessary expense. However, the numbers don’t lie.
The expense of keeping your air conditioner is significantly less than the long-term cost of poor performance, inefficiency, and frequent repairs.
Cooling expenditures might account for up to half of your total energy spent. If you can reduce these monthly expenses, your savings will grow. Instead of paying the total price for less cooling or more to keep your whole house comfortable, have your AC serviced once a year.
Improves the Lifespan of Your Unit
An AC system can last anywhere from 15 to 20 years, depending on the brand and model, how often you use it, and how well it is taken care of during that time. By having an annual check-up, you can ensure that your expensive AC system lasts if possible.
When your system is full of dust and dirt, it must work harder to keep your space comfortable and shorten its lifespan by several years. Furthermore, parts may wear out with time, and leaving them unrepaired may require a new system.
Avoid this by scheduling a yearly tune-up to ensure that your air conditioner is in good operating order and that it is still within its expected lifespan.
Increases Safety
Before turning up your air conditioner for the summer, it’s essential to inspect it after a long winter because rodents could invade it. During the colder months, it’s typical for a rodent to seek shelter within your air conditioning unit, and it’s even more common if your AC unit has a cover.
It is also possible that the winter destroyed some wiring and electronics. When loose, wires begin to arc and degrade, resulting in additional arcing. Eventually, the AC fails, and the wires burn out.
The Bottomline
An expert should service your air conditioner at least once a year. Investing in HVAC annual service helps ensure your unit performs well when needed. Remember that keeping the system clean and well-maintained will save money and prevent it from paying considerably more on a costly repair. There are numerous benefits to performing yearly AC maintenance, making it a no-brainer to do so.
Order Today!
Already have a list of products from our vast selection of access doors, roof hatches, and floor panels? If customization is the next agenda on your list, it’s time to talk with our knowledgeable and experience-laden product experts.
In the roofing industry, knowing the different latest trends is a plus, especially if you’re planning to create a new establishment. While a business may remain steady, recent changes in the industry can impact your work every year. Staying on top of what’s happening can help you prepare for customer demands. New roofing technology trends can also unveil current, safe, and economical ways to get the job done.
Here are some of the trends in the roofing industry that you might want to know:
Metal Roofs
You won’t see this roofing material phasing out any sooner. This roof design has a unique visual appearance and is highly functional, which may be why it is coming back. If you want to enhance your home’s aesthetic and create a practical choice, then a metal roof may be the way to go.
That said, metal roofs are more expensive than the other options. You’ll likely be spending less in the next few years because this roofing material has a long lifespan and only requires minimal maintenance. You can choose from many different styles, allowing you to customize the look to your needs quickly.
Contrasting Colors
Using contrasting colors is a unique option when choosing a roof design. For example, if most of your establishment is light-colored, you should aim for a darker-colored roof. The roof should not fade into the background but should be a powerful part of every structure’s design style.
You can also find many bold-colored roofs available in the market today. Reds and blues are making a quick comeback as establishment owners move away from the monochromatic colors that were trendy during the early 2000s. If you’re reconstructing your roof, you may want to consider a bolder shade.
Rolled Roofing
Rolled roofing material is the top choice for low-slope residential roofs and out-buildings like shops, sheds, and other valuable structures. Experts created this material through long rolls of mineral-impregnated and asphalt-impregnated material mixed with mineral granules.
These large-format strips of thin roofing material offer a quick, convenient, and inexpensive way to cover a sloped-roof building like a workshop where appearances aren’t necessary. You can apply rolled roofing with either a torch-down or roofing nails.
If you want inexpensive material, then rolled roofing is what you need, as it only costs around $1.50 to $2.50 per square foot. Rolled roofing can last up to ten years before you will need to replace it.
Cool Roof and Cooling Tiles
The booming trend of cool roofs and solar tiles are in line with the growing demand for eco-friendly materials and green roofs. Professionals can achieve cool roofs in several ways. Manufacturers make many materials that absorb less heat, but others involve using a lighter color or incorporating reflective tiles.
These can help homeowners keep their houses cool, reduce the need for air conditioning, and save energy. Similarly, roofs with solar panels or tiles generate electricity and work to keep buildings cool.
Green Roofing
Green roofing is becoming increasingly favored today as people are leaning towards sustainability. It involves growing plants on your roof, which includes moss and short grasses, which can reduce the amount of heat in your establishment.
Of course, this option is a bit more complex since you’ll need to plant a garden on your roof! Installing a residential roof access hatch will allow convenient access to your top while creating your green roof. Regardless, it can be a unique design choice that sets your establishment or home apart when accomplished precisely.
Final Thoughts
If you’re planning to create a roofing construction business or a new home or establishment, keeping in touch with the latest trends will help you become aware of the most opted product in the market today. Doing so will give you more options of what material best suits your establishment type.
Call us now!
Looking for top-quality access doors is not easy, but don’t worry! Best Access Doors is here for you! We provide vast options of access doors and different construction products that will surely fit your preference. Contact us now at (800) 483-0823!
These days, building design ideas that incorporate both practicality and aesthetics are more popular. In other words, if the structure isn’t practical and can’t accommodate many people, these folks will lose interest in the design.
People sometimes disregard hardware such as access panels and doors despite their obvious utility. Most people have no idea whatever this thing is capable of because they’ve never heard of it. The purpose of an access panel or door is to provide inhabitants with easier access to locations that might otherwise be inaccessible.
They are typically hidden behind walls or stairs and need access to the outside in case you need to clean or mend something there. Make sure they have some ventilation. Aside from that, the panel installation comes with many other benefits, detailed below.
Safety Purposes. Cables and wires are used in modern buildings to provide energy and internet service to their occupants. As a result, the utilization of cables and wires is now unavoidable. The problem is that this can lead to several potential hazards, especially when children are around. It is best to devise various solutions to keep children from accessing the wires.
Building an area behind the wall, especially in a corridor or kitchen, where you can keep all the wire installations without being concerned each time your children play around is an option for you to consider. You’ll need a fireproof entry door to keep your building safe and prevent a fire from spreading.
Added Space for Storage. You can still use the access door as an alternate storage option even if you decide to install all the cable installations on the ceiling to avoid them getting wet. Using this method, you’ll be able to keep your valuables safe in a vault that no one can see. It may appear to be a regular door to nowhere from the outside, yet you can store your most prized possessions there.
Durability. Nobody wants to buy a product they’ll only use a few times. When purchasing an access door or panel, it is beneficial for both the client and the contractor to consider the door’s or panel’s durability. Moisture might allow mold to grow on the panel, putting its structural integrity and your health at risk. When built of steel or aluminum and appropriately installed, access panels have the potential to be a long-lasting investment. This long-term investment, however, will only be realized if the contractor not only fully grasps the panel’s operation but also appropriately installs it.
Convenience. If you hide many building components and systems behind outside walls or other coverings, the people who do building maintenance could have problems accessing such components and systems. They will nearly always have to damage the exterior of the building to get to the system underneath, which will increase in the amount you have to pay for construction charges.
Once they have finished, they can close the door and return to their work area without damaging any surfaces. If professionals frequently need to get onto the roof of your building, you might want to consider installing aluminum roof hatches in addition to drywall access doors. Access doors can always permit safe and convenient passage, provided sufficient area is behind the surface.
Don’t waste time and turn to Access Doors and Panels right away! We have a team of product experts that will guide you throughout the process to ensure you get the right product you require. Place your orders now at (800) 609-2917. Need more content about commercial construction? Check out our informative blogs today!
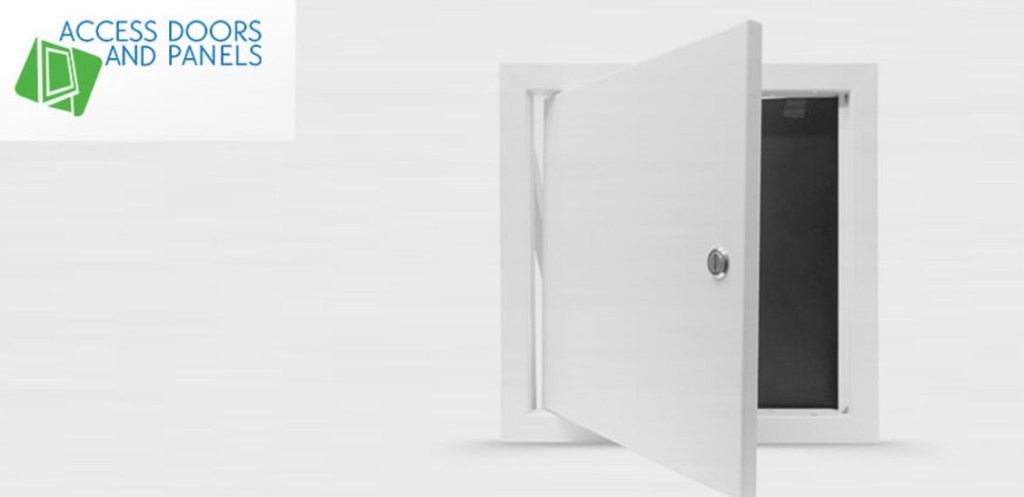
If you have ever been on the premises of a business or industrial establishment, there is a good possibility that you have encountered an access panel. Removable panels, known as access panels, are used to gain entry to locations that are usually off-limits to the public. These spaces could include everything from plumbing lines to electrical cables. Access panels are the most common in commercial and industrial buildings, but in specific residential properties, they are also present. Most buildings that contain access panels are businesses and factories.
What is an access panel?
An access panel is a panel that provides access to an area behind it, often for repairs or maintenance. Access panels are usually removable, so they can be easily opened and closed as needed. It is common to find them in walls, ceilings, and other pieces of machinery. Metal, plastic, and wood are all materials you can use to make access panels. They come in various sizes and forms depending on how much space they will cover. Most access panels have some frame or trim around the edge to give them a finished look.
In most cases, the installation of access panels takes place during the construction phase of a building. However, they can also be added after if necessary.
Different Types of Access Panel
An access panel is a versatile building material that comes in various sizes, designs, and materials to fulfill multiple applications. One of its primary uses is reaching places behind walls, ceilings, roofs, and floors and performing repairs and maintenance on individual components. Check out the many types of access panels below!
Standard access panels
Home and business owners frequently utilize this access panel. They usually have a simple frame and door and can be mounted on any wall.
Fire-rated access panels
These fire-resistant panels are standard in commercial and industrial buildings. They usually have a metal or glass door, which you can put on brick or drywall.
Decorative access panels
These panels can assist you in blending in with your surroundings if you are looking for a way to do so. They usually have a frame and door made from wood, plastic, or metal and can be mounted on any wall.
Security access panels
These drywall access panels are commonly employed in commercial and industrial establishments to deter intruders. They typically have a metal or glass door and may be mounted on masonry or drywall.
Specialty access panels
These panels meet the requirements of particular applications in homes, businesses, and industrial settings. They may be built out of any material and hung on any wall, making them versatile.
If you need an access panel for your home or business, here are a few things to remember when choosing one.
You will need to decide on the material to construct the panel. There are many options available, including metal, plastic, and wood.
You will be responsible for determining the dimensions and shape of the panel. It is essential to verify that the board you select will be able to be installed in the designated area without causing any obstructions.
At this point, it is necessary for you to settle on a design for the panel. There are numerous options, and you should have no trouble locating one that satisfies your requirements and preferences.
There are many different uses for access panels.
You can use them to access electrical wiring, plumbing, or ductwork.
You can use it to access HVAC equipment or other mechanical systems.
You can also use pipes or wires with access panels for aesthetic reasons.
The installation of access panels in a building is critical and requires expertise. If you are unsure how to install an access panel, it is best to hire a professional. A professional will know how to properly seal and secure the board and install it in a way that meets building codes.
Final Thoughts!
An access panel is an excellent option if your house or office regions need access. Whether you are looking for an easy way to get in and out of your attic, want to be able to run cables through the walls, or need a place to store important documents, we have an option that will work for you. Give us a call today and let us help you choose the perfect access panel for your needs. We can wait to hear from you!
Get your project started by calling our hotline at 1-800-483-0823. Or you can create a custom quote request and get your quote back in 30 minutes! It’s as easy as that!
Commercial buildings are more focused on energy efficiency. Every sensible organization or company is always looking for ways to reduce energy use and environmental effects. They want to cut down on energy costs while making as few changes to the business as possible. So, new energy management systems and other suitable solutions can save 5–15% of energy and usually pay for themselves in three years.
Energy efficiency cuts costs while reducing pollution and carbon emissions. Using utility access panels simplifies maintaining and repairing the building’s ductwork, wires, and other equipment.
Here are some ways to increase the energy efficiency of your existing business building or upcoming commercial development project.
Consider “Smart Building.”
An automated “smart” building describes these types of structures. These controls consist of interconnected sensors and actuators to construct an intelligent data collection application. It is essential to collect data and use it to run different systems in buildings so that utilities work well, save energy, and cut energy costs.
A smart building system saves money because it gives a 360-degree view of the entire structure, no matter how many buildings are on the campus. The data collected by these technologies can be utilized to analyze, track, and communicate with people.
It allows centralized monitoring. In this case, all facilities are under constant monitoring. They only send field engineers when something goes wrong.
Even so, manual preventive maintenance is still the best way to keep equipment from breaking down and accidents from happening. It prevents as much damage to your business as possible. Therefore, you and your team can focus on what is already working rather than fixing the damage.
Recognize Cost-effective Methods
It is possible to minimize energy costs using quick, inexpensive methods significantly. Turning off office equipment such as printers, monitors, computers, and copiers into “sleep mode” while not in use, for example, will save around 40% on energy expenditures. Taking care of your HVAC system frequently is another low-cost way to make sure that the most significant energy user in your building is running well. Regular coil and vent cleaning can result in $0.10 per kWh in energy savings for condenser and evaporator coils, for example.
Use Energy-Saving Lighting
The second-largest energy consumer after heating and cooling is lighting. It would be best if you used energy-efficient lighting to cut energy costs. One way is to use occupancy sensors so that the lights only turn on when someone is in the room.
The other highly effective method is to employ energy-efficient lighting, LED, or HID. You can also consider whether you could add more windows or skylights to let more natural lights come in. The choice of lighting will rely on the individual lighting requirements.
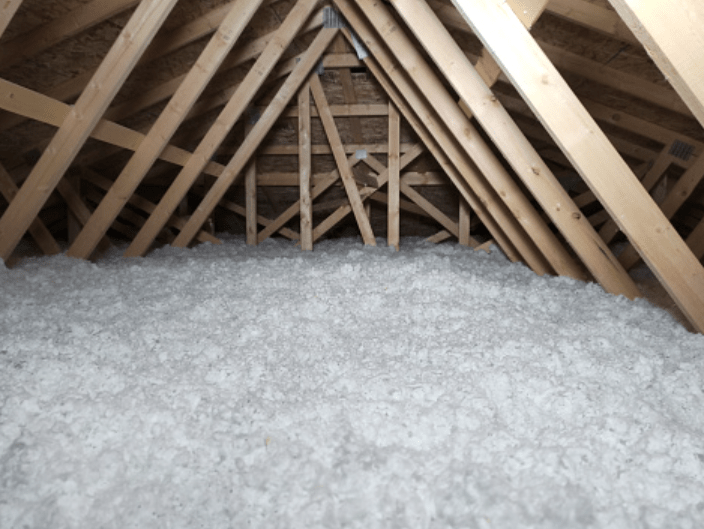
Enhance Building Insulation
Insulating your HVAC system, heating, cooling pipes, and electrical outlets will aid in preserving energy efficiency and decreasing energy waste. Insulation offers a barrier against the movement of heat, reduces the cost of heating and cooling a building, and improves occupant comfort. You can also use internal or external wall insulation to prevent heat loss through the building envelope and increase the energy efficiency of structures. Additionally, adding insulation on the exterior reduces disturbance to the residents, eliminates mold growth, and reduces maintenance.
Utilize Renewable Energy
Solar panels, air-source heating systems, and wind energy are all effective ways to improve the energy efficiency of commercial buildings and reduce energy consumption. These will influence the effectiveness of the structure and assist in lowering energy expenses. Furthermore, the usage of nonrenewable energy sources such as fossil fuels increases the release of greenhouse gases. Therefore, it’s wise to use solar panels to power a building.
Self-generation electricity also minimizes additional energy expenses, resulting in lower electricity bills. Additionally, it safeguards against power outages and shortages. Installing solar panels and utilizing solar or wind energy is optimal for energy conservation.
Takeaway
You may increase the efficiency of your building by implementing more efficient energy sources, lighting fixtures, insulation, and intelligent technologies. Also, to make an energy-efficient choice, you must look up a product’s energy efficiency standards before installing it in your building.
These energy conservation projects will increase energy efficiency and decrease energy expenditures. You can utilize these cost savings to cover maintenance and other obligations.
Order Today!
Do you need supplies of customized access doors, roof hatches, and floor panels in bulk that can get to your project site fast and safely? Best Access Doors is here for you! Get a quote with us and receive it within 30 minutes!
A great commercial building properly balances aesthetic appeal and commercial viability. While innovative structures and the latest designs are necessary for the aesthetic, a functional establishment must include detailed services and a well-planned layout for the occupants while maintaining energy efficiency.
A commercial building can achieve energy efficiency and reduced energy bills through proper insulation. It improves the overall performance, reduces harmful greenhouse gas emissions, and helps keep your energy bills down. In addition, it can also deliver higher resilience to extreme weather, provide better comfort, and reduce stress on the electricity grid.
Enhancing your commercial building’s insulation can be as simple as sealing open holes and leaks, installing gasketed access doors and panels, to more complex materials that enhance the totality of your establishment. If you want to know the different insulation types used in commercial construction, then keep on reading;
Blanket (Batts and Rolls)
Blanket insulation, commonly used in commercial buildings, comes in two forms, either batts or rolls. Blanket insulation consists of flexible fibers, commonly known as fiberglass. Aside from that, it can also be manufactured from minerals, wool, plastic fibers, and natural fibers, such as sheep’s wool and cotton.
Batts and rolls are available in different sizes suited to standard spacing of wall studs, rafters or attic trusses, and floor joists. You can cut continuous rolls to fit any structure you want to insulate. Manufacturers often include a facing (kraft paper, foil-kraft paper, or vinyl) to act as air barriers and vapor. A facing also helps assist with fastening and handling during installation.
2. Concrete Block Insulation
Concrete blocks are the main foundation used to build walls, and there are many ways to insulate them. If the central area is not filled with steel and concrete for structural reasons, you can fill it with insulation, which increases the average wall R-value.
It is essential to install insulation over the surface of the blocks, either on the exterior or interior of the foundation walls. Placing insulation on the cover has the added benefit of containing the thermal mass of the blocks within the available space, which can regulate indoor temperatures. Some manufacturers include polystyrene beads into concrete blocks, while others create concrete blocks that house rigid foam inserts.
3. Rigid Foam
Rigid foams are perfect for insulating almost any area of your home. They are beneficial in exterior wall sheathing, interior sheathing for basement walls, and other special applications. This insulation provides excellent thermal resistance (about two times greater than other insulating materials with equal thickness) and reduces heat conduction through structural elements, like steel studs and wood. The most common materials used in making foam boards include polystyrene, polyurethane, and polyisocyanurate.
4. Insulating Concrete Forms
Insulating concrete forms are a mixture poured into concrete walls, which will, later on, be a part of the wall assembly. This process creates barriers with high heat resistance. Even though ICF homes use concrete, they look like any traditional homes. ICF contains interconnected foam boards and hollow-core foam insulation blocks. The foam boards are joined together using plastic ties. Aside from foam boards, you can also add steel rods for extra reinforcement before pouring the concrete. Steel rods are placed inside the cores to reinforce the walls when utilizing foam blocks.
5. Loose-Fill and Blown-In
Loose-fill insulation comprises small particles of foam, fiber, or other materials. These tiny particles form an insulation material that can fit any space without disarranging the structures. This ability to adapt makes loose-fill insulation suitable for retrofits and locations where it would be tricky to install other types of insulation.
6. Reflective System
This insulation is unique among other materials because it does not need to fill in a particular structure in a building—radiant barriers and reflective insulation function by reflecting radiant heat away from your establishment or home. Radiant barriers are more effective in hot climatic areas, primarily when the cooling air ducts are located in the attic. Studies show that this insulation system can decrease cooling costs up to 5% to 10% when used in sunny climates. The minimized heat gain may even allow for a minor air conditioning system.
Every entrepreneur aspires to an energy-efficient establishment. Aside from its beneficial effects on the environment, it also helps enhance indoor comfort and reduce energy bills. There are still other insulation materials available. Insulation systems may vary depending on their material cost, labor, application, and capacity. Ensure you collaborate with your contractor on what type of insulation will suit your commercial building best.
If you enjoy reading blogs about commercial construction, you can always visit our website at Best Access Doors! We also provide high-quality products like access doors for any of your project needs. If you ever require any help on your purchase journey, you can contact us directly at (800) 483-0823 for more details!
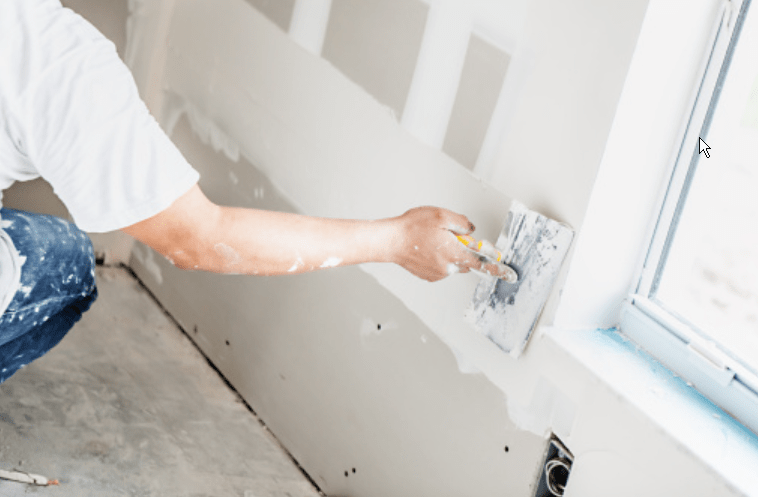
Drywall is among the most inexpensive and prevalent building materials used in the construction industry. It is cost-efficient, fire-resistant, and has insulation and sound-absorbing properties. Drywall sheets come in various styles and designs and are also highly versatile, making them ideal for other applications other than creating walls and ceilings.
Although drywall hanging pattern does not need much expertise, they can quickly become a complicated process. Due to poor drywall installation procedures, even an experienced professional will struggle to create a flat, undamaged surface and prepare for paint.
Here are some of the strategies and tools that professionals use to complete drywall jobs quickly and as smoothly as possible.
Setting Up a Drywall
Step 1: Within 4 inches of drywall edges with no reinforcement, fasten the wood backing. Ensure that all corners and ceiling/wall joints are in good working order.
Step 2: Trim the sheet to length. Measure from the ends of the ceiling up until the midpoint of a joist. You should split the framing components at the end cuts. Edges and splices should have intervals of less than 1/4 inch. A drywall square indicates attaching instructions every 16 inches from the sheet’s border. To make fitting easier, trim overall lengths 1/4 inch shorter.
Step 3: Using a drywall square as a straightedge, determine the required length and score the material surface with a utility knife.
Step 4: Split the paper open, fold it in half, then cut through the back of the sheet.
Step 5: To achieve tight couplings, use a Surform instrument to level rough edges on the cut ends.
Step 6: To hold a substantial share of the weight, raise the ceiling sheets upward and tack them into position with a “crutch” formed of 2x2s. Nail and install the sheet on the joists, nailing it in place.
Step 7: Take measurements from a wall border to the middle of a framing member, taking note of cuts and door and window entrance distances. Avoid putting joints over the edges of doors and windows, as they may fracture.
Step 8: By slicing the sides of a single sheet with a drywall saw, you can cut the window and door notches. Although a keyhole saw is sluggish, it is a good option for long cuts.
Step 9: Using a utility knife, mark the third side of the notch.
Finish the cuts from the back by snapping the part and detaching it. Use your utility knife to draw behind the T-square while sliding it along the top for rapid rip cuts.
Step 10: Raise the top wall sheet and fasten it into position with nails, keeping it close to the ceiling. Before securing, make sure you press the sheet tightly. Breaking joints along the border of a window or door is never a good idea. These gaps will inevitably fracture, and the tape buildup will challenge casing installation. Before hoisting, remember to mark the fastener guidelines.
Step 11: You should measure the cutouts in electrical boxes from all four corners. Before cutting, double-check all plan dimensions.
Step 12: Make a mark on the drywall with your dimensions. If you miss when designing and cutting slots for electrical boxes, that big outlet hole will be a pain to replace. Repairing an opening with a bad cut or overcut is challenging, and the result will never be perfect.
Step 13: Attach the bottom sheet into position using a foot lift or a flat bar. If you need to create minor adjustments to an opening, use your utility knife to scrape the corners.
Step 14: Using a screw gun, fasten the ceiling and walls together. Every structural member should have five fasteners in each tapering border and three more equally placed per 12 inches. Screws on the extremities of sheets, when there is only 3/4 inch of wood remaining to catch screws, should be at a slight angle. If you put them near the end, the drywall base will shatter, and they won’t hold up well.
Place nails and screws slightly underneath the paper’s top, ensuring not to puncture the gypsum base. To conceal the fasteners, place them near the window and door holes so that the border will cover them. For 1/2-inch rock, utilize 1-1/4-inch screws, and for 5/8-inch rock, utilize 1-5/8-inch screws. Nail pops are more likely with lengthier screws and nails. Use as few nails as necessary and only attach the sheets until you can install the screws.
Step 15: After completing the drywall, go over every fastener with a putty knife. You might find a stray pin that you need to set if you notice a snap. If you use your hammer to fix a jutting Screwhead, the screw may break, resulting in a giant hole to patch and the possibility of a nail popping later.
When you come across a protruding Screwhead, use a screwdriver or a handheld drill to push it in. Uninstall any screws that did not make contact with the frame component. Consider any other essential elements running underneath the drywall like plumbing or wiring by installing access doors. Installing fire-rated insulated access panels with drywall flange might be an excellent idea.
Final Thoughts
DIY installations may cost you less, but they come with certain risks, except if you have adequate experience and the right tools. Working with a licensed professional is undeniably better so that you no longer have to worry about making a mistake and end up spending more than hiring a contractor. In addition, they can offer insights into other factors that you might miss and provide additional advice.
Order Now!
If you are looking for drywall accessories like an access door, you are in the right place. Here in Best Access Doors, you can choose from our vast collection of drywall access panels or speak with our product experts to know which product is the most suitable for your needs. Call us now at (800) 483-0823 to learn more about our exciting promotions!
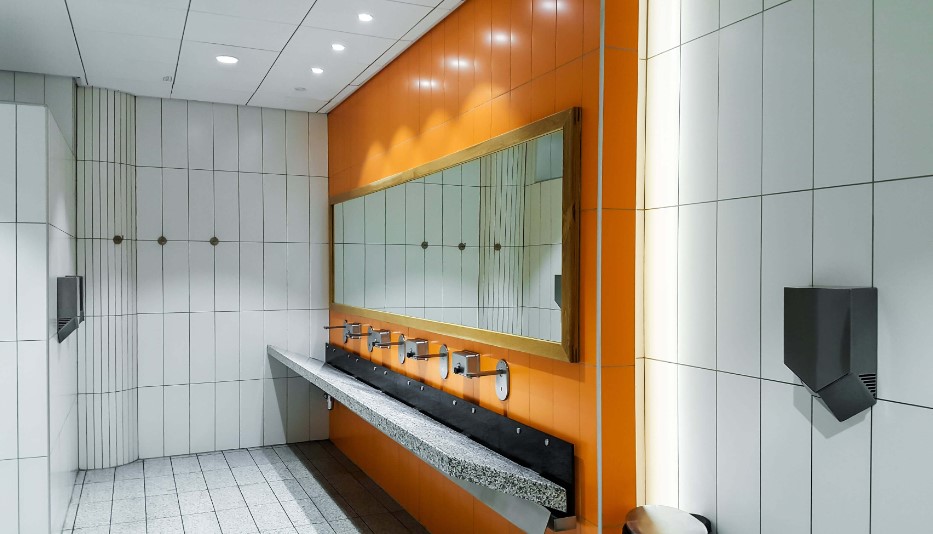
There are many horrific tales of ruined office space due to water damage. Moisture and condensation can cause significant issues and possible health hazards. Maintaining your office space is critical to your business operation to protect its contents and occupants.
What Is Humidity?
Humidity is the amount or level of water in the air. The air around you can carry a certain quantity of water vapor or moisture, depending on the circumstances. When the location is hot, it can heat the water in the air resulting in hotter air getting retained. This heat retention can cause discomfort and even health risks.
One can measure the level of moisture in the air relative to the quantity of water vapor the air could hold before it reaches total saturation. A relative humidity level of 30 to 50 percent inside is generally sufficient to ensure optimum comfort levels.
Methods of Controlling Humidity
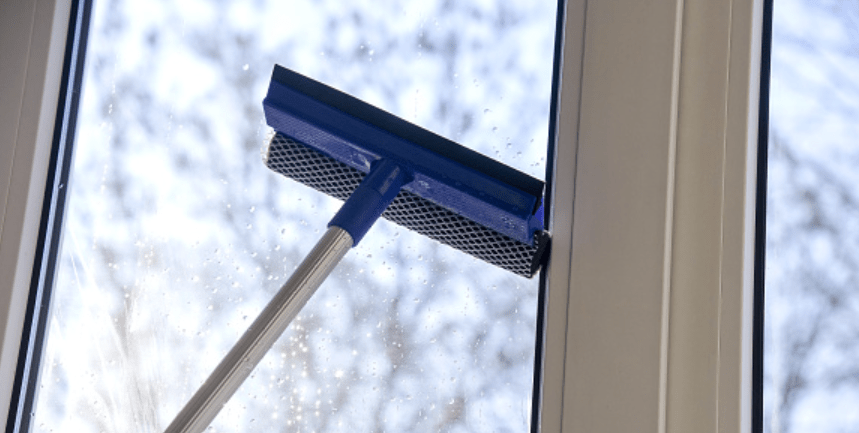
1. Clean Your Windows
If you are dealing with issues concerning condensation on your windows, maintaining their cleanliness is the first line of defense. Using a water repellent solution can also assist and prevent moisture from forming and damage to your windowsills.
2. Ensure Proper Ventilation
You may notice a considerable accumulation of humidity in the office if you don’t have sufficient ventilation, particularly in the bathrooms, especially on hotter days. Installing an exhaust fan in the correct places or merely opening a window can go a long way toward lowering humidity and keeping it from becoming trapped in the workplace, causing severe damage and inconvenience.
3. Utilize Dehumidifiers
Don’t give up if your natural office humidity-reduction options aren’t working. One practical approach to reducing condensation and humidity in the office is to use a dehumidifier. Many types are specifically for use in large offices. Search for ones built explicitly for your office’s size, or install multiple smaller versions in different locations, especially if you know where humidity is a problem.
4. Control the Temperature
It can be enticing to reduce the temperature in the office during hotter days to keep people comfortable. However, using the air conditioner can increase condensation, which can cause issues for everyone in the facility. Alternatively, you can utilize fans to circulate the air and maintain the temperature more manageable.
Insulation can also help in temperature control, and since the walls, ceiling, and floorings already have a level of insulation, you might not worry too much, but there are still ways to improve. During maintenance procedures, your insulation might become compromised. You can remedy this situation by installing an insulated wall access door to preserve indoor heat and manage internal conditions.
5. Check Your Vent’s Location
Directly pointing vents at windows can reduce the value within the window below that of the entire office. It not only wastes energy and raises your power bill without really chilling the office, but it also causes condensation to develop on the windows. Instead, direct your vents away from the window and point them in the center of the room, which will allow more air to circulate freely, making everyone feel comfortable.
6. Check Your Kitchen
In many offices, having a kitchen is a luxury. There are times that the kitchen may add to the humidity in the office: steam from your food, the dishwasher, and even hot water for hand-washing dishes can all contribute to the moisture.
To keep your office more pleasant, ensure that your kitchen has adequate ventilation, using fans and open windows. Try not to use the dishwasher or prepare intricate meals on highly humid days in the kitchen.
7. Effects of High Humidity
When the humidity in your office becomes too high, dust mites and microorganisms can thrive. Mold might start to grow as the air becomes damp. Regrettably, some people (particularly asthmatics) may develop health complications. High humidity might make you feel tired and can affect your focus. For these reasons, preventing high humidity levels in office buildings is crucial.
Additionally, too much humidity can warp some materials like wood. High humidity can be a severe issue in establishments that trade or manufacture wood items and those with wood floors and furnishings. Printing businesses and papermakers are in the same boat. High humidity can also be hazardous to museums, pharmaceutical enterprises, and historical structures.
The Bottomline
Never compromise the safety and health of everyone working in your office space. Ensure that you have a regular maintenance schedule to counter or address any issues that could result from excess humidity. If you need more information about countermeasures that you can enforce in your setting, have an expert work with you and ensure that your decisions are solid.
At Best Access Doors, we excel at providing high-quality products and services to our valued customers. We have categorized items for your shopping convenience and various options to ensure you get what you need. Call us at (800) 483-0823 for your orders and questions.