Drywall is an easy-to-use and cheap construction material that you can use in your building. It is also known as sheetrock, rock, or wallboard, and is an important part of the construction. Before the recognition of the use of drywalls, a huge amount of time to build a foundation that can hold paint or wallpaper was needed. Now, you don’t need a truckload of tools in installing drywall. All you need to do is just get yourself familiar with the fundamentals of installing drywall.
Installing drywall and even a drywall access panel doesn’t even require a lot of finesse but it can still be heavy work if you are not fit and you don’t know what to do. Fortunately, if you have a strong back and you can climb at least four steps without wheezing, then you don’t have to be afraid to tackle one or more rooms on your own.
This article will teach you the basics of installing drywall.
Start With the Right Layout
This is the first basic step in installing drywall. You have to know the sizes of the drywall. Typically, it comes in 4’x8’ sheets. Larger sheets with 4’x12’ are available but they are harder to work with and are usually used by professionals. The larger sheets also tend to break easily during transport.
Installing drywall means that you first have to take a pencil and mark on both the floor and ceiling the placement of the vertical studs. This will help you simplify the attachment of the drywall panels. Instead of following the usual professional method, you can begin in one upper corner of the room and install the panels horizontally with the top edge against the ceiling. Make sure that the end of the panel falls over the center of a stud and you may also need to score and snap the panel so it will fit.
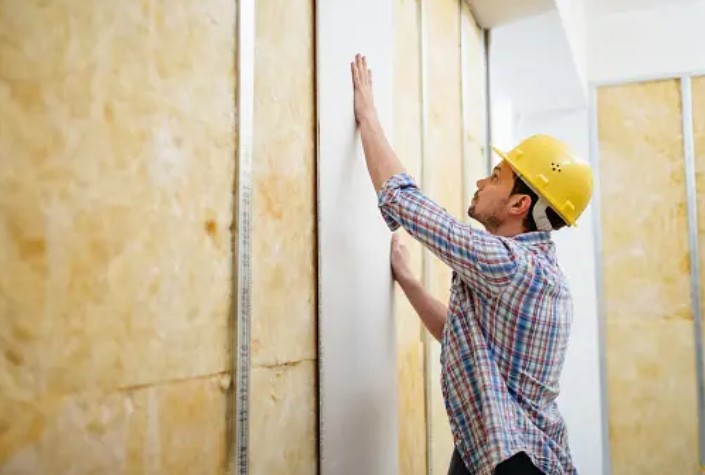
Attach the First Panels
You can now begin attaching the panels by driving some screws or nails on the ends and down the center of the panel to hold in place against the studs. Drive the screws far enough to dimple the surface of the drywall but not hard enough to break the paper surface. If you are using ½-inch-thick drywall, you can use one and a half inch long screws and nails. For ¾-inch-thick drywall, use one and three-eight inches screws. Keeps the screws along the sides of the panel, at least a half-inch away from the edge. Put 8 to 12 inches apart spaces between the fasteners along the side edges and not more than 16 inches apart where screws attach to the studs.
Cut the Adjoining Panel
The next step is to measure the distance between the first drywall panel installed and the end of the wall. You may also need to install a full second panel for larger rooms while for smaller rooms, it is more possible that you will have to cut the adjoining panel to size. In trimming drywall panels, the easiest way is to score the face of the panel with a utility knife guided by a drywall T-square of a metal straightedge, and then snap the panel away from the scored line. Continue the installation until all the drywall panels in the top row are positioned and attached between the walls.
Make Cutouts Around Outlet and Switches
Here, you can take careful measurements to make cutouts for electrical boxes and other obstructions, and then transfer them to the drywall panels to mark cutout locations. Next is to remove the panel and use a wallboard saw or rotary drywall cutout tool to finish the cutout marks. This panel can now be positioned on the wall and then you can attach them with screws or nails.
Hang Drywall Around Windows and Door Openings
If the drywall panels fit around window and door openings, you will need the panels to be notched to fit around them. You can do this by taking measurements and marking the drywalls, then cutting along the marks with a rotary cutout tool or a manual drywall saw.
In attaching panels around windows and doors, you have to make sure to use all the required screws or nails because structural strength is also critical. Also, avoid aligning the joints between panels along the edges of windows or doors, or placing them directly above or below windows and doors.
Hang the Lower Panels
Lastly, install the bottom row of panels. You can begin installation in the opposite corner of the room to offset the vertical seams from the top row to the bottom. You may also need to use a foot-operated wallboard lift to lever the lower panels upward since they have to be snug against the top row of drywall. The preference is a ½-inch gap between the bottom of the lower drywall panel and the floor to allow room for some seasonal expansion and contraction of the drywall. This will help prevent buckling.
Once you are done, you can already ask a professional to do the finishing touches for your drywall installation.
Need help installing a drywall access panel? Visit https://www.accessdoorsandpanels.com/blog/ now.
